I wrote up a brief description of creating a custom enclosure for a difficult document over at Erin Fletcher’s Flash of the Hand blog. Hopefully it will give folks some ideas for tackling their own enclosures.
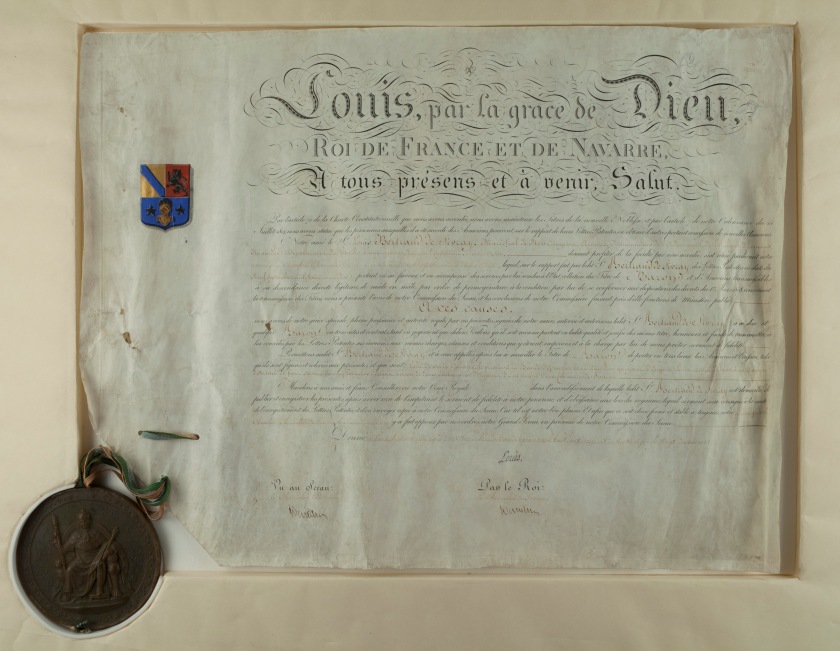
I wrote up a brief description of creating a custom enclosure for a difficult document over at Erin Fletcher’s Flash of the Hand blog. Hopefully it will give folks some ideas for tackling their own enclosures.
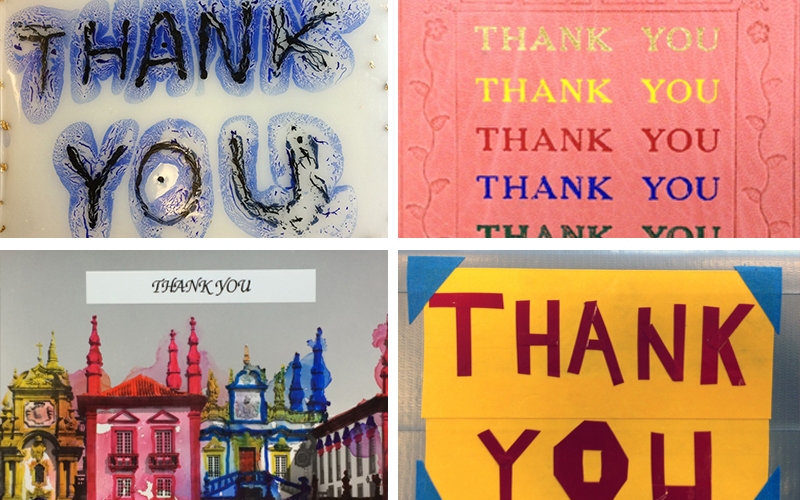
Following the colloquium last November, Cher Schneider and I made some custom “thank you” cards for the speakers using the topics of their talks.

The first Biennial Conservation Colloquium was held at the University of Illinois at Urbana-Champaign in early November 2014. Four conservators traveled to Urbana from the UK and across the country to speak about their research or practical experiences with various adhesives in library and archives conservation. Thanks to generous funding from the UIUC Library and the Andrew W. Mellon Foundation, the day-long event was free to 50 attendees. This review will attempt to summarize the major points of each talk and hopefully encourage others working in the field to visit us for the next event.
Another year, another set of hosting decisions! Everything is getting overhauled. You’ll notice the the recent theme change and I’ve decided to abandon my other hosted website and just stick to this WordPress platform for the next year. My domain name (henryhebert.net) is currently linked to this account, but it will become the primary domain soon.
I know things have been very quiet here lately, but I’m currently working on a set of three posts for the Conservation Conversations series on Erin Fletcher’s blog. The first will drop in the middle of next month. In the meantime (and just in time for Halloween!), please enjoy this this wonderful 16th century costume. Just grab a buddy and saw apart a table and you too can put your head on a platter!
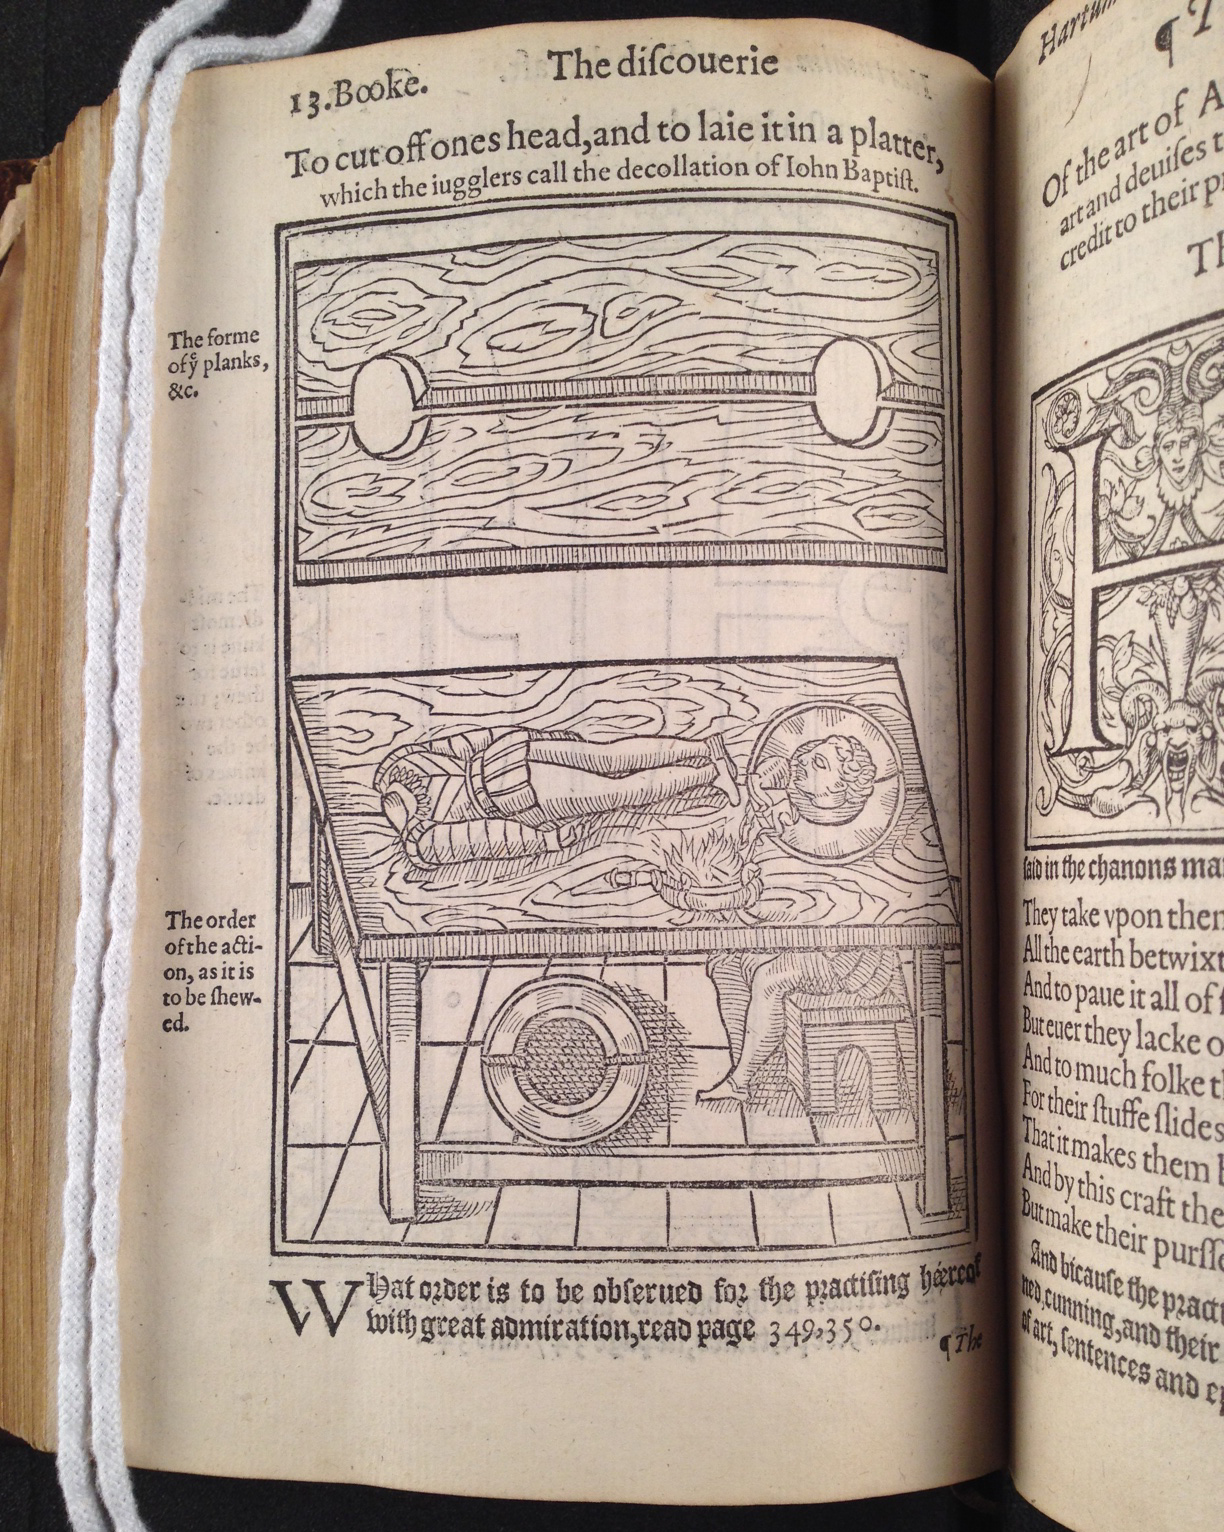
Reginald Scot’s The Discoverie of Witchcraft, 1584
If you have not been listening to Susan Mills’ Bookbinding Now podcast, you should should go ahead and subscribe. Every other Wednesday, Susan posts an interview with a practitioner of some type of book work. Book artists, conservators, printers, calligraphers, bookbinders – there is something for everyone. While we are on the subject of podcasts: I also really enjoy Steve Miller’s Book Artists and Poets.
In early December, I was interviewed for Susan’s podcast by my former classmate Erin Fletcher. If you would like to hear me babble about books and conservation for half an hour, you should head over to the site and check it out… then stay and listen to Susan’s interviews with more talented and interesting folk:)
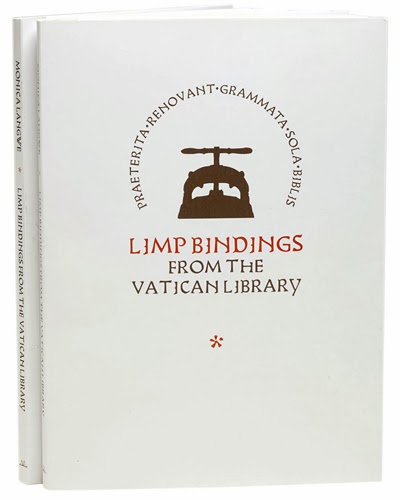
I recently wrote a review of Monica Langwe’s new book. You can check it out on Bonefolder Extras – just click the photo.
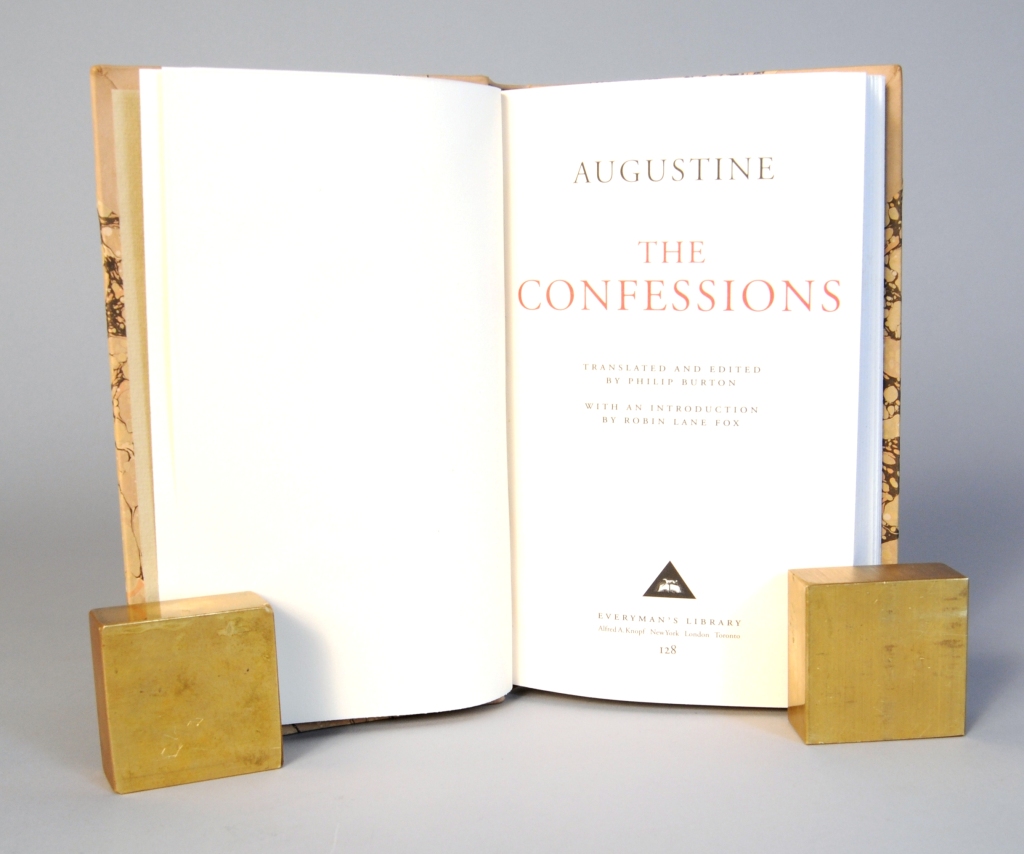
In the spring of this past year, I was asked by a friend to create a nice binding for a copy of St. Augustine of Hippo’s Confessions. He had an idea for a traditional looking binding with more modern design elements, and working together, we came up with this:
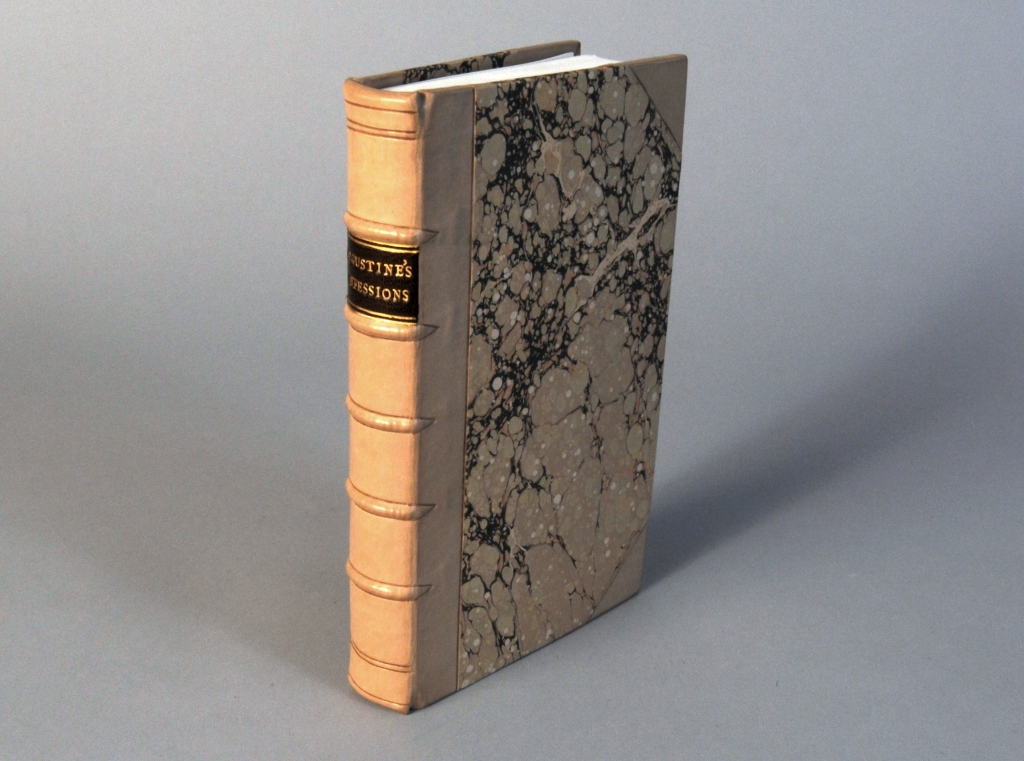
The forwarding is essentially the same as the 18th century trade binding I described in my last post: sewn on five single raised supports, undecorated edges, and two color sewn endbands.
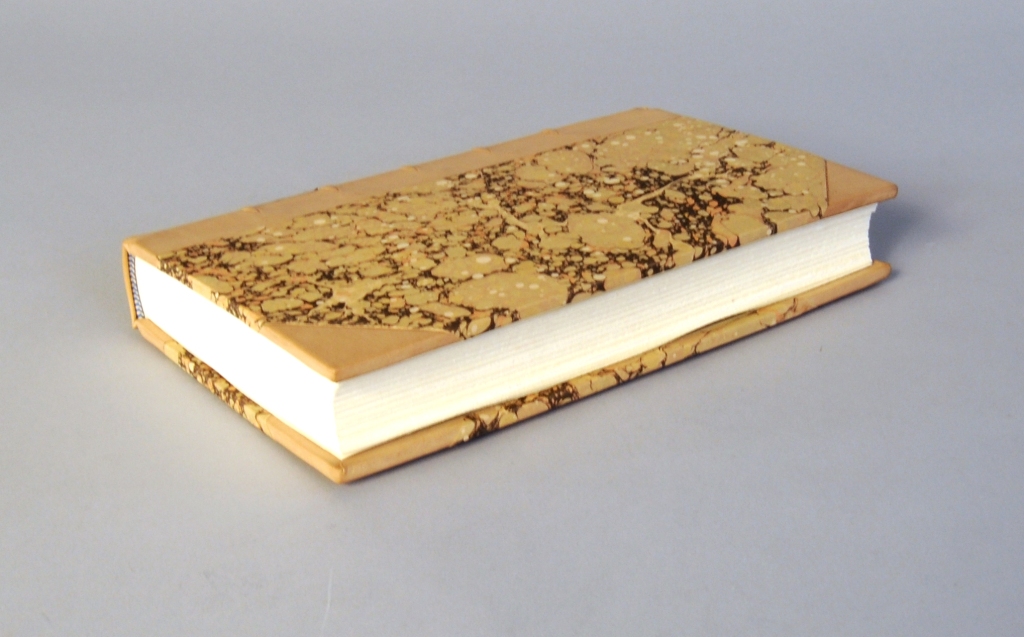
The spine and corners of the binding are covered in undyed calfskin and the siding-up is a stone pattern marbled paper that I created during the workshop with the St. John’s. The finishing is very simple: blind tooling on the spine and faces of the boards, and a brown goatskin lettering piece, done with handle letters.

In order to do this binding, I needed an edition that was composed of sewn sections, rather adhesive-bound sheets. We found a modern Knopf printing that looked nice and was suitable.
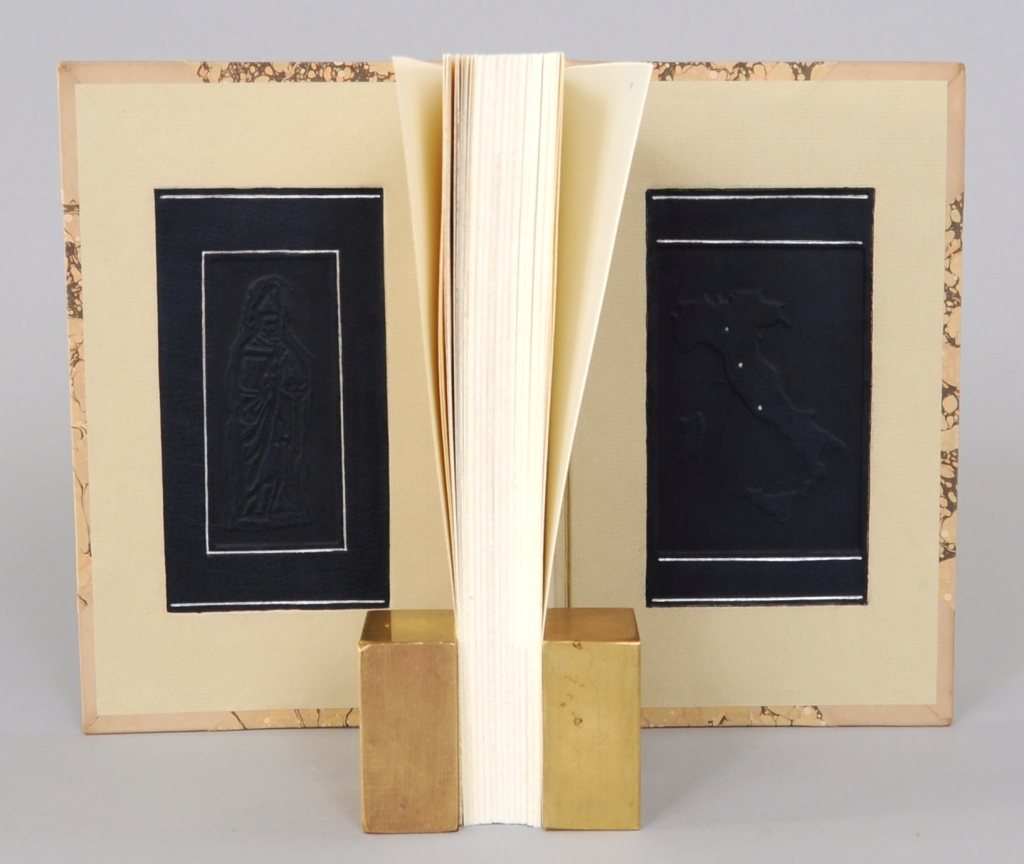
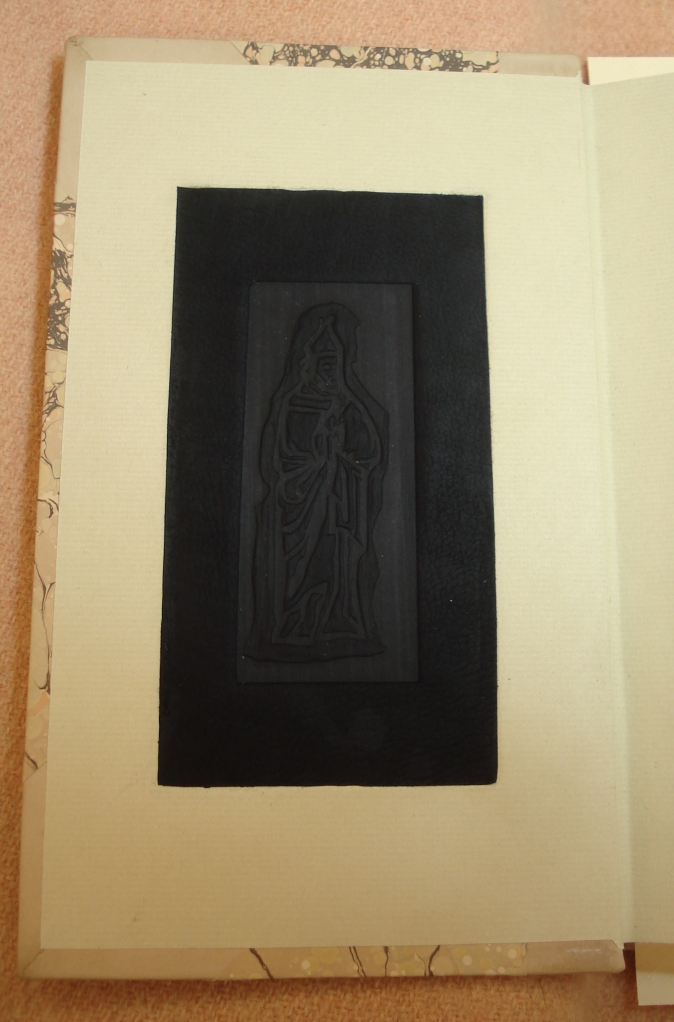
This binding was intended as a gift, to be given during a tour through Italy. Working collaboratively, we created a design that would make the book unique and document the trip. The insides of the boards feature blue calfskin panels, pressed with woodblocks and tooled with palladium. St. Augustine appears on the inside of the front board, while the back board shows a map of Italy with the location of each stop on the trip marked in silver dots. I’ll describe how the panels were made below. At the time, I did not know how to do doublures or leather hinges, so my method is probably a bit odd.
As I was making up the boards, I built a well into the inside of each.

After covering and trimming out, I adhered the pastedowns, carefully working the paper into sides of the well. In a tight-joint binding in which the pastedown and flyleaf are composed of paper with no additional leather hinge, the pastedown will come up short along the fore-edge. This gives an uneven appearance, since the visible turn-in (i.e. the square) on the fore-edge is much larger than those at head and tail. To compensate for this, I trimmed the head and tail of the pastedown so that the squares would match with the fore-edge. The cut goes to about a board thickness away from the joint and the transition is mitered at a 45 degree angle. This allows the full length of the endsheet to go over the joint, while leaving a neat transition. What I have described is most visible at the tail part of the joint in the above photo.
My friend is an accomplished woodworker, so he carved the woodblocks for the front and back board, drawing inspiration from depictions of St. Augustine.

St. Augustine by Piero della Francesca (1454), Museu Nacional de Arte Antiga, Lisbon
A basswood block, shorter and narrower than the wells, was cut in shallow relief. The blue calfskin was flat pared so that it was thinner than the depth of the well – I did not want it to sit proud of the board surface when done. It was then dampened, pasted up, and worked into the well. While the leather was wet, I simply aligned the woodblock and gently pressed it into the leather using a nipping press.
 I got the idea from Katherine Beaty’s presentation on Islamic bindings at last year’s GBW Standards meeting (see her handout here). I repeated the process for the map of Italy on the back board.
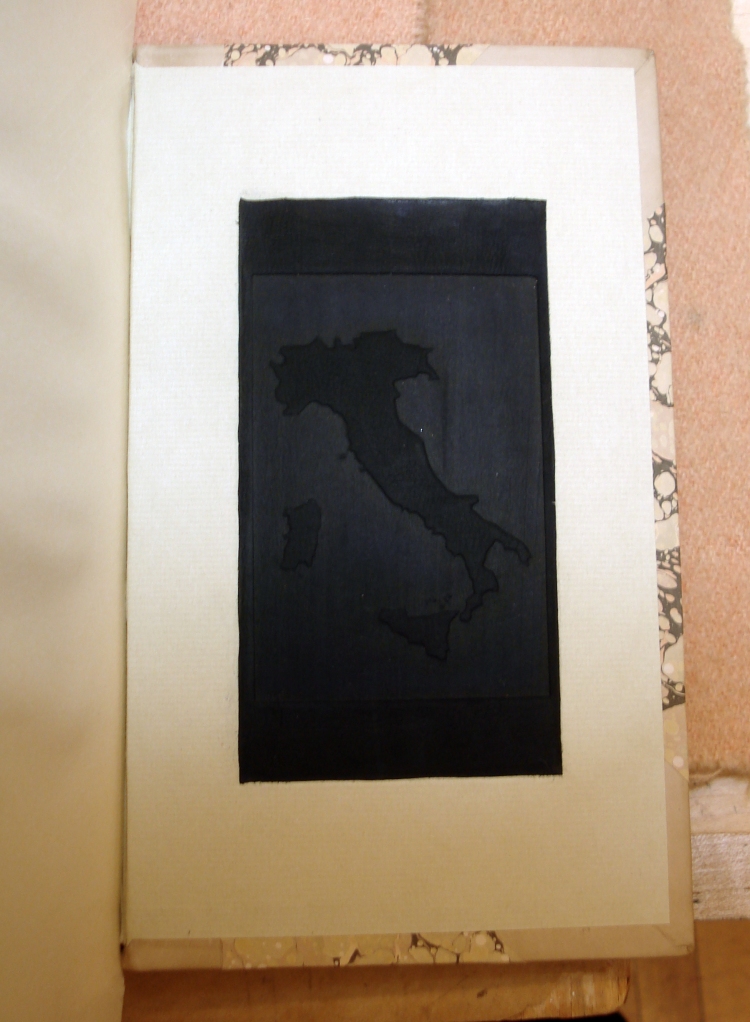
When dry, I added some tooled lines at the edges of the leather in palladium and also marked the stops on the trip with tooled dots. I was very pleased with the way the woodcuts came out on the leather. The calfskin takes the grain of the wood beautifully, and after polishing the surface a bit with a heated iron, these panels really look great. My only complaint in this binding is the edge between the paper pastedown and leather panel; I wished it could have been a bit cleaner. If I was going to do this again, I would forego the paper and do it as a sunken doublure. I did not know how to do doublures at the time, so it couldn’t really be helped. I will definitely be using woodblocks for future bindings, however.
It is time to wrap up and say goodbye to 2012. This has not been the easiest year for me personally, but I learned a great deal and got to work with some very talented folks. Quetzalcoatl didn’t rise up and destroy the world either, so I think overall we can judge it a successful year. In this moment, I’m feeling setup for a pretty great 2013 – in a couple weeks I will be moving to the Midwest and starting a new job. I am sure that I will have plenty of material from my upcoming adventures to share here .
Wishing you and yours a safe and pleasant New Year!
One of the first full leather bindings that I did at NBSS was a calfskin binding in the style of trade bindings popular in the 18th Century. The textblock is sewn on single raised cords that are laced into the boards. The leather is sprinkled and tooled in a style that is known as the “Cambridge Panel”.

I’m going to admit upfront that I don’t know all that much about the history of this style of binding. I know that they are common for the period, as they are quick to execute and, depending on the extent of decoration, were probably rather inexpensive for a full leather binding. I will venture to guess that a lot of the form in this structure evolved from demand for print and speed of production, availability of materials, and working conditions within the binding trade at the time. Since a great deal of information surrounding the book trade in England and France in the 18th century is still up for debate, and we are working with completely different materials today, this model is really a poor approximation/composite derived from examining secondary sources and historical examples. In the end, it probably looks and acts very differently from an authentic binding of the period.
A list of references will appear at the end of this post. If you wish to learn more about this style of binding, I encourage you to read some of those – or attend one of Jeff Peachey’s lectures or workshops on the subject. The NY Chapter of the GBW has a nice review of one of those workshops here.
With those caveats, onto the discussion of how I produced this model. I started by folding down sheets of Gutenberg laid paper to make sections. Rather than relying exclusively on pressing to condense the textblock, traditionally the sections are beaten with a large hammer on a marble slab. The beating compresses the paper and allows the sections to form into one another. After pressing, the kettle sewing stations are sawed in and the endsheets added before sewing onto single cords. For this model, I made endsheets composed of a single folio of marbled paper nestled inside a single folio of plain paper. The literature, however, describes a few variations for endsheet structures.

For larger books, there would be more sewing supports; however, this model is extremely small, so I stuck with five. This textblock was sewn without pre-punching the sections. The textblock was then rounded and backed.
Book board during this time period was very different from the manufactured board we typically use today. To give the book a more appropriate feel, pasteboards were made from cotton linters using Alan Puglia’s method (1996). Rather than making two separate boards the size of the book, I made a single large board and cut it in half, holding the knife at a 45 degree angle. This produced two boards, each with a bevel that would fit into the shoulder of the textblock. The picture below was taken before the final spine shaping, but illustrates the cut of the boards.

The ends of the sewing supports were frayed out, and twisted to points with a bit of paste and the boards are laced on. My model is done in more of a French style, so the lacing is done in a 3-hole pattern common to French bindings. English bindings from this period make use of a two-hole lacing pattern.
 With the French board lacing, the cord on the inside of the boards can be “cross-mounted”, so that the end threads back under itself and is essentially locked in place. The lacing is hammered on a hard, flat surface to close up the holes and flatten the boards.
 Bindings from this period exhibit a range of different spine linings: from no linings at all, linings at just the head and tail panels, to full parchment transverse spine linings. I went with the latter, but cutting the parchment into a comb shape that passes through the lacing, rather than fighting with individual patches (see above and below). According to some of the manuals, these parchment linings were put on before backing the book. That seems really difficult to me, so I ended up rounding and backing mine a bit before lining, then finishing the spine shaping off as I was adhering the parchment.
 When the spine is shaped and lined, the plain and marbled folios of the endsheets are made together with wheat starch paste and left to dry under weight. Now it’s time for trimming and edge decoration. The head and tail of the textblock are plowed in boards, shifting the boards down a board thickness each time to create a square. Next, the boards are pulled back and wooden trindles are pushed between the boards and spine to temporarily flatten the round out.
 The fore-edge is plowed and the trindles removed to reshape the spine. The fore-edges of the boards can then be trimmed to the appropriate length in the plow.
As for edge decoration, I know of four styles that were popular during this period and ranged in price: all edges red, sprinkled, marbled, or gilded. Vermilion was most likely the pigment used to create red edges – but since that substance is toxic, I decorated my edges with watercolor. After edge decoration, single core, two-color endbands are sewn on (pictured far below).

At this point, the textblock is ready and now the leather must be prepared. A piece of undyed calfskin is cut out, leaving about 1″ for the turn-ins, and is marked up for paring. After edge-paring with the knife, I created a long bevel out along the edges of the leather and thinned the spine area using a modified spokeshave. This is not an 18th c. tool, but it certainly makes life easier. After paring, the leather is dyed to an appropriate brown with analine or sellaset dye.
 The covering process is unremarkable, except for the corners. In a modern leather binding, careful attention is given to mitering the corners and doing the turn-ins so that where the leather meets at the corners does not show. For this model, the corners are just cut with scissors after the leather is turned in. Crude, but quick. After covering, the book is tied up for 10-15 minutes to make sure the leather is adhered around the raised bands.
 After drying overnight between felts, the book is opened and the joints are set.
A few of the bindings that I have seen from this period have either leather patches or are covered with two or more joined pieces of skin. I thought I would give the process a try with this model, so I selected a piece of calfskin for covering that had two sizable holes. After covering, I pared around the edges of those holes and inlayed more dyed calf. The result was not totally seamless, but is was more or less effective and ends up looking way better after decoration and polishing.

The Cambridge panel design for this binding is created through sprinkling the leather and then tooling it. As with the edge decoration, I have foregone the traditional chemicals for sprinkling in favor of black leather dye. The panel design is created through a series of templates that can be easily lifted away.

The boards are opened and the textblock is placed in a lying press. After masking off the area around the book…
 … the two center panels are placed on the boards. Not wanting to spray leather dye all over good weights, I taped some old piano tuning pins together to hold my panels down.

The leather is then lightly sprinkled evenly across the areas of board and spine that are exposed. Now the inner panel is removed and the outer-most panel is placed on. A little tent is also made to shield the spine. The inner-most panel is heavily sprinkled with dye.  The result looks like this:
 I got a little overzealous with the brush and ended up with a few large dots; ideally the sprinkling would be much finer.
The tooling pattern is fairly simple, but with a great deal of variation in historical examples. Using double or triple line fillet, pin-dot rolls, or other decorative rolls, the sprinkled panels are outlined. Fleurons typically appear at the corners of the outer panel. Here is a photo taken after the first set of lines.
 The edges of the boards are often tooled as well, either in blind or gilt. I used a decorative roll with a floral design that is wider than the board thickness.

I decorated the spine with double gilt lines on the sides of the bands and a red lettering piece.

Titling on 18th century books is done with handle letters rather than a type holder, so there is a bit of movement in the letters. It also appears that most finishers didn’t plan out their titling before starting, so their spacing and layout seems very odd to the modern reader. I copied the titling for my model from this first edition of Candide from 1759.

After the finishing, the pastedowns are adhered inside the boards. Since this is a tight joint binding, this structure of endsheet comes up short at the fore-edge, giving pretty uneven squares. The paper pictured below comes from The Marbler’s Apprentice. This is one of their older papers, so the pattern is a bit too large for the size of this book; however, I understand that they are now offering these same papers in smaller patterns as well.

I’m thankful that the long weekend has given me some time to put together a post for November. As always, I have a number of other topics in the works – stay tuned.
______________
Bennett, S. (2004). Trade bookbinding in the British Isles, 1660-1800 (1st ed.). New Castle, Del.: British Library.
Dudin, M. (1977). The art of the bookbinder and gilder. Leeds: The Elemente Press.
Gauffencourt, J. (1987). Traite de la relivre des livres: A bilinqual treatise on bookbinding. Austin: W. Thomas Taylor.
Hobson, A. (1954). The literature of bookbinding. Cambridge: University Press.
Pearson, D. (2005). English bookbinding styles 1450-1800 : a handbook. London: British Library ;
Pollard, G., & Potter, E. (1984). Bookbinding manuals: An annotated list of technical accounts of bookbinding to 1840. Oxford: Oxford Bibliographical Society.
Puglia, A. (1996). Pasteboards. The Book and Paper Group Annual, 15. Retrieved from http://cool.conservation-us.org/coolaic/sg/bpg/annual/v15/bp15-13.html
I’m currently in the middle of my book conservation fellowship at the Boston Athenæum. The library’s collection is full of strange and unusual things, but the other day a book came through the lab with a previous repair that I had never seen before.

This is a quarto-sized volume with heavy boards that, at one point, had separated entirely from the book. Rather than go through the time-consuming process of rebacking or rebinding this volume, someone created a new board attachment with three strips of thick leather and a couple of brass rivets. Here is a detail of the head:

I’m actually kind of impressed with how neatly this repair was done. The leather repair strips are adhered firmly to the spine and along the boards. While the heads of the rivets are large, they sink down into the thickness of the leather repairs, so there is no danger of them catching or scratching the companion volumes on the shelf. The ends of the leather strips on the board are also cut into a pleasing curve.
 Here is an overview shot of the inside of the board.

While the rivet heads on the inside sit a bit proud of the board surface, I do not observe any damage or discoloration to the paste-down or title page. While crude, the repair functions very well – maintaining a strong attachment, while allowing the boards to open easily.

This book came to the Athenæum in the early 1950’s. The conservators have not seen other volumes in the collection treated in the same way, so we can assume this repair was done before the book entered the collection.
Looking at the full-thickness leather and quality of the rivets, I honestly wonder if this was done by someone whose primary business was not books at all: perhaps a cobbler or saddle maker. The novelty of the repair makes me think that a previous owner brought the book to some tradesman who had some spare leather and a riveting machine in their shop and asked them to “give it a go” on some book repair. Is this method of board attachment unique or just uncommon. If you have seen something like this before, please comment below.
Despite how hectic things have been this summer, I’m committed to getting a post in for the month of August. It’s also my 50th post! This one is a brief “instructable” for making a fancy leather binding out of a not-so-fancy trade paperback. Unfortunately, I only took one in-process photo of the book, so much will be left to the imagination.
This past spring I was in a gift-making mood and had a devious idea for a good friend of mine, who is a bibliophile and connoisseur of the occult. I started with a common edition of The Book of Lies by Aleister Crowley. It is a perfect title for this structure…
") This book is what you would call “perfect” bound – single sheets attached with only adhesive and covers composed of a single piece of printed or laminated card adhered along the spine. Since the book is completely square, I could not simply stick a leather case binding on it. There is no round in the spine and, because of the lack of sewing, there is no swell. In order to put on boards of any thickness, a false shoulder had to be constructed on the book.
This book is what you would call “perfect” bound – single sheets attached with only adhesive and covers composed of a single piece of printed or laminated card adhered along the spine. Since the book is completely square, I could not simply stick a leather case binding on it. There is no round in the spine and, because of the lack of sewing, there is no swell. In order to put on boards of any thickness, a false shoulder had to be constructed on the book.
After tearing off the paper covers, I placed the textblock in the job backer and, using the hammer, rounded the spine a bit and formed a small shoulder. A piece of thin cord is then saturated with PVA and stuck to spine edge of the textblock at front and back to further build the shoulder. The spine and false shoulders are then lined with Japanese paper to consolidate and hide the cord. If the for-edge of the book remains flat after shaping, a round can be sanded into it with sandpaper and an appropriately sized piece of dowel.
The endsheets for this rebinding are composed of a plain paper folio, with a piece of thin leather or book cloth tipped to the outside of the fold. Decorative paper is then made to the outside of the folio, covering the edge of the bookcloth or leather, one board thickness away from the fold. This will be a tight-joint binding, with an island pastedown. We want the decorative paper on the fly-leaf to end at the seat of the shoulder and not ride up across the hinge. The finished endsheets are pictured below:

I used papyrus instead of decorative paper for this binding. The use of the material references the author’s experiences in Egypt, but also adds a nice textural feel to the endsheets. Unfortunately the pull of the papyrus overcomes the paper I used for the folio, so the flyleaves don’t lie flat. This isn’t a fine binding, however, so no need to despair! The endsheets are tipped to the textblock and worked with the bonefolder to finish creating an even, 90 degree shoulder to the thickness of the boards.
Philip Smith (1974) describes a sturdier method for creating a false shoulder in which the cord is wrapped in pasted-out leather and formed into a triangle as it is adhered to the bookblock (p. 85). The endsheets are then over-sewn through the false shoulder. If this was a larger book, I would probably have employed Smith’s method.
When the endsheets are on and the new shoulder is formed, the endbands are stuck on the spine. I made rolled leather endbands (to the height of the squares) for this binding in the same way that I did for the millimeter bindings. Once again, the picture below shows the final look. It’s black goat on black goat… so a bit tough to see.

After endbands, the rest of the spine is in-filled and sanded to make it flat and smooth. A 1-on-2-off hollow is then constructed on the book and trimmed down so that it doesn’t show over the endbands.
Next the false bands (or “sham-bands”) are constructed out of strips of parchment laminated to full-thickness leather. These will give the book the appearance of being sewn on raised supports, encouraging the causal reader to think that I have spent considerable time and effort creating this binding. But remember – it’s a book of lies! Regardless, this is a time honored tradition: bookbinders have been using false bands to fancy up their products while cutting production time since at least the mid-17th century (Pickwoad, 1994, p. 91).
 To give the bands a crisp 19th-century look, I attached them with the parchment side out. I placed them where sewing supports would be along the spine of the book, centering them toward the head. The bands are put down with PVA and trimmed off flush with the face of the board.
Now we are almost ready for covering. The boards are cut to size and back-cornered. The leather for the spine and corners is flat-pared to 0.7 mm and then pared German-style so that the turn-ins are the thickness of the in-fill material. At this point, the leather for the corners can be put on.
The covering process for this book is a bit odd, because the boards are not laced on. After placing the boards on the book (aligned and squared-up), the book is secured in the lying press. The spine leather is dampened and pasted out. The spine of the book is sized with paste and a little PVA is brushed onto the bands to make sure they stick. When ready, the leather is molded over the spine by hand. The bands are gently set with band nippers to mark their place.
Quickly, the book is removed from the press and the textblock pulled away from the boards. The spine turn-ins are done, leaving enough leather to form the headcaps. The head and tail of the textblock spine should be re-pasted at this point so that the turn-ins will adhere, and the boards are placed back on the textblock. The leather can be really worked down now, and the band nippers are used to set the bands. Headcaps are formed and the leather is worked into the back-corners of the boards. After going back across the bands with the nippers, the boards are set by opening them back and re-seating them in the joints. Everything is then double checked to make sure nothing has moved. After about 10 minutes of drying time between felts, the book is triple checked! The result is something like this:

The above image is after trimming the leather, in-filling with card and siding up with marbled paper. I made the paper with with Chena River Marblers in our Marbling Workshop.
Leather covering on a book is certainly fancy, but adding a bit of gilding will make it that much better.

The finishing on this structure is actually much lower risk than a typical binding with laced on boards. At this stage, the paste along the spine is the only thing attaching the leather case to the bookblock. If something goes terribly wrong with the tooling or titling, you can just pull the covers right off and re-make them. You will lose some leather and some boards, but that is a small price to pay!

When the tooling is finished, the leather or bookcloth hinges are adhered to the insides of the boards to completely attach the case. The turn-ins and hinges are trimmed out and the insides of the boards are filled with paper to level the surface. Finally, the paste-downs are adhered to the insides of the boards.

This structure is not particularly sturdy, nor does it open all that well. It does, however, look a great deal nicer than the original paper binding.
I promised that this blog would endure and it will – although my posting schedule will probably remain erratic. I can commit to churning out at least one thing a month, though. Stay tuned – exciting times ahead!
_______________
Pickwoad, N. (1994). Onward and downward: How binders coped with the printing press before 1800. In R. Myers and M. Harris (Eds.), A Millenium of the Book (61-106). Delaware: Oak Knoll Press.
Smith, P. (1974). New directions in bookbinding. Van Nostrand Reinhold.
