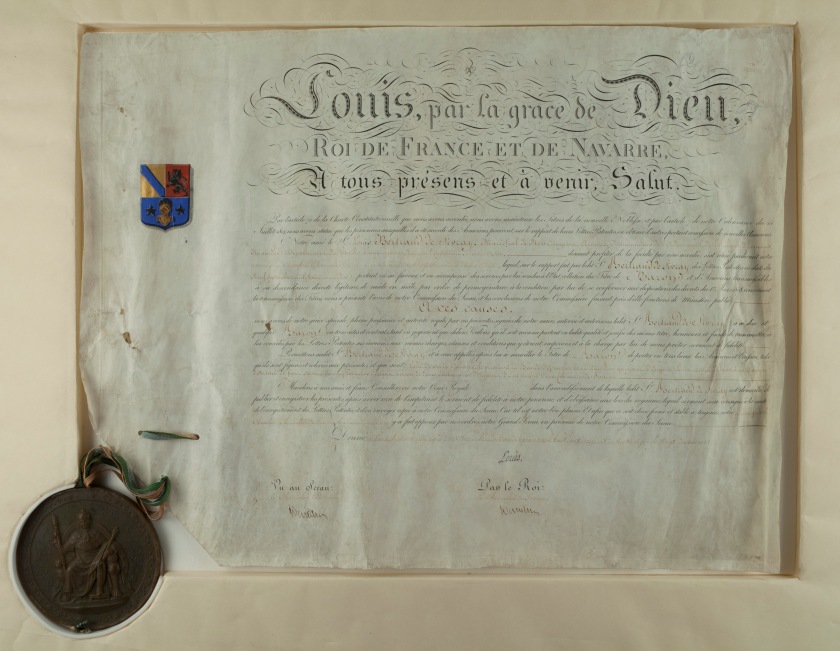
I wrote up a brief description of creating a custom enclosure for a difficult document over at Erin Fletcher’s Flash of the Hand blog. Hopefully it will give folks some ideas for tackling their own enclosures.
I wrote up a brief description of creating a custom enclosure for a difficult document over at Erin Fletcher’s Flash of the Hand blog. Hopefully it will give folks some ideas for tackling their own enclosures.
If you have not been listening to Susan Mills’ Bookbinding Now podcast, you should should go ahead and subscribe. Every other Wednesday, Susan posts an interview with a practitioner of some type of book work. Book artists, conservators, printers, calligraphers, bookbinders – there is something for everyone. While we are on the subject of podcasts: I also really enjoy Steve Miller’s Book Artists and Poets.
In early December, I was interviewed for Susan’s podcast by my former classmate Erin Fletcher. If you would like to hear me babble about books and conservation for half an hour, you should head over to the site and check it out… then stay and listen to Susan’s interviews with more talented and interesting folk:)
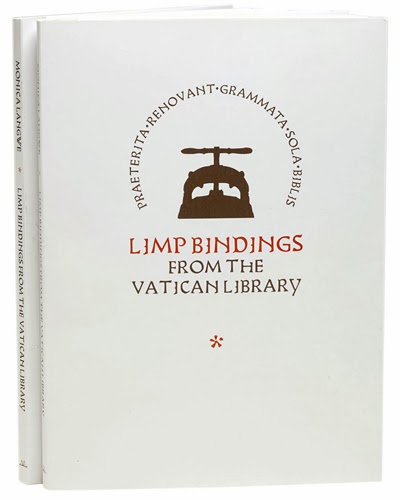
I recently wrote a review of Monica Langwe’s new book. You can check it out on Bonefolder Extras – just click the photo.
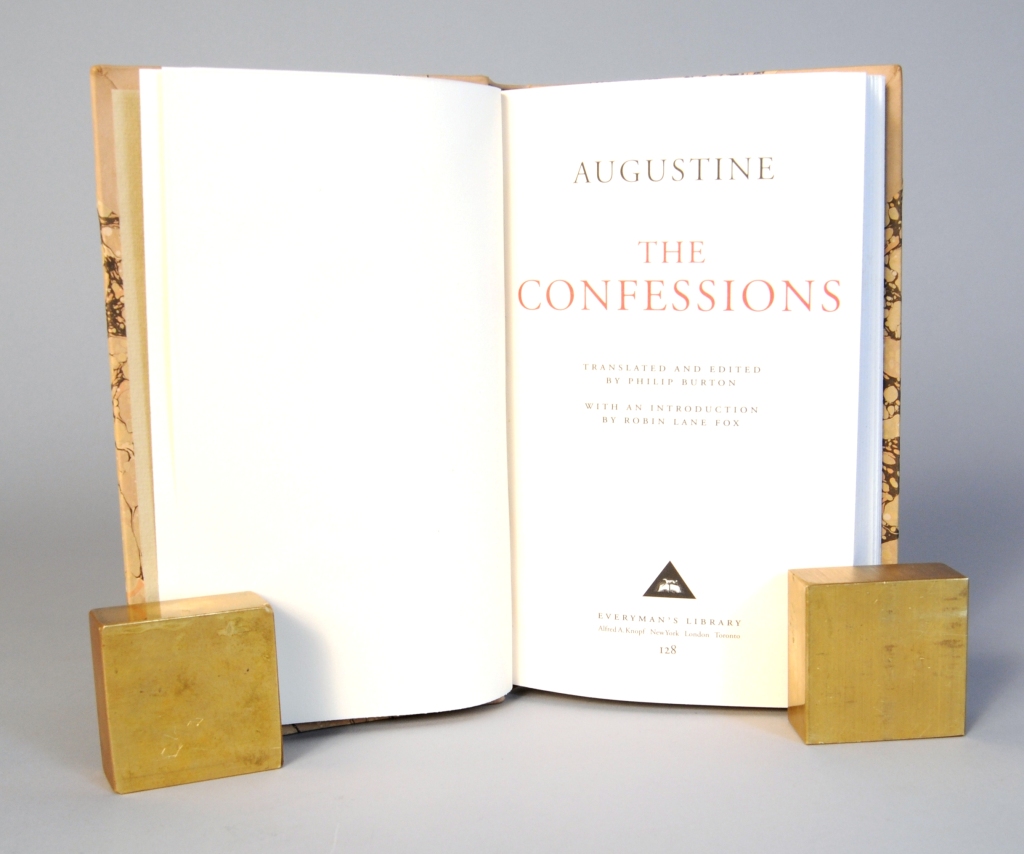
In the spring of this past year, I was asked by a friend to create a nice binding for a copy of St. Augustine of Hippo’s Confessions. He had an idea for a traditional looking binding with more modern design elements, and working together, we came up with this:
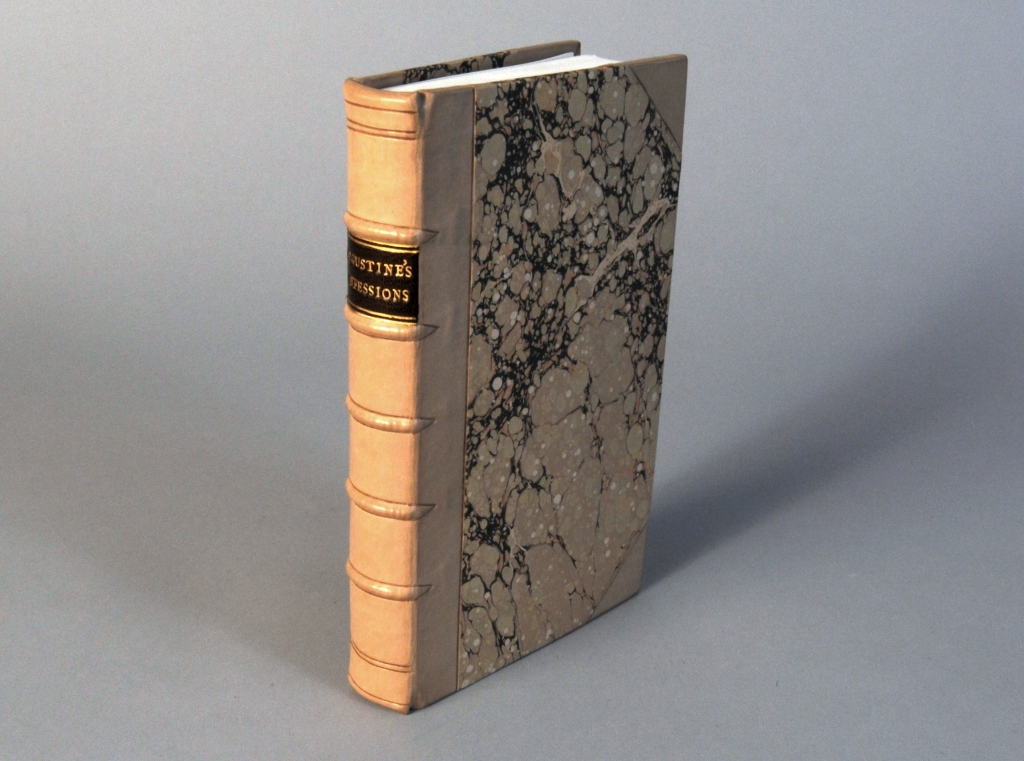
The forwarding is essentially the same as the 18th century trade binding I described in my last post: sewn on five single raised supports, undecorated edges, and two color sewn endbands.
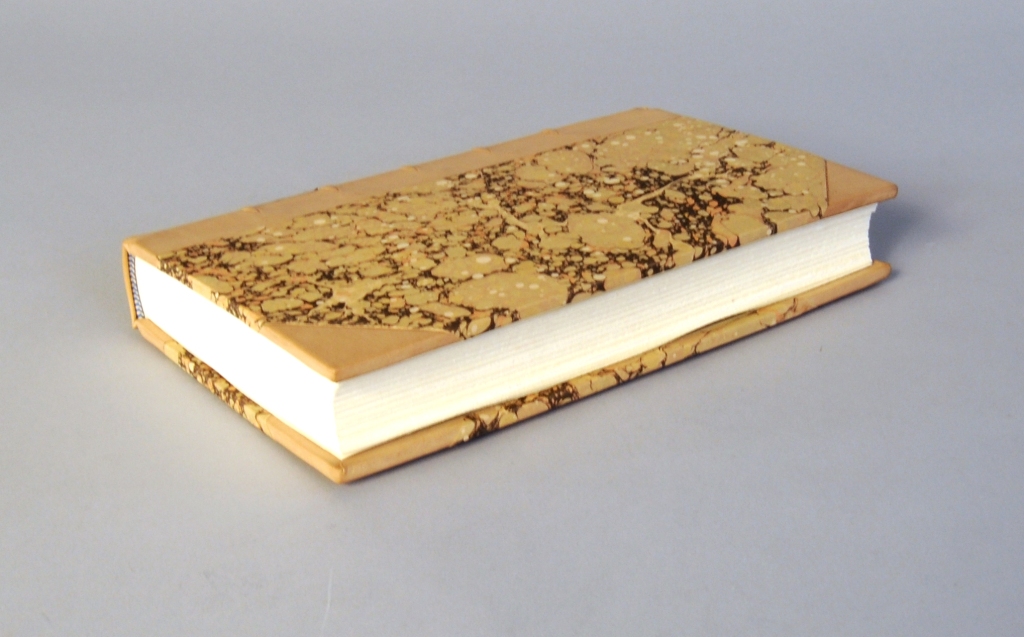
The spine and corners of the binding are covered in undyed calfskin and the siding-up is a stone pattern marbled paper that I created during the workshop with the St. John’s. The finishing is very simple: blind tooling on the spine and faces of the boards, and a brown goatskin lettering piece, done with handle letters.

In order to do this binding, I needed an edition that was composed of sewn sections, rather adhesive-bound sheets. We found a modern Knopf printing that looked nice and was suitable.
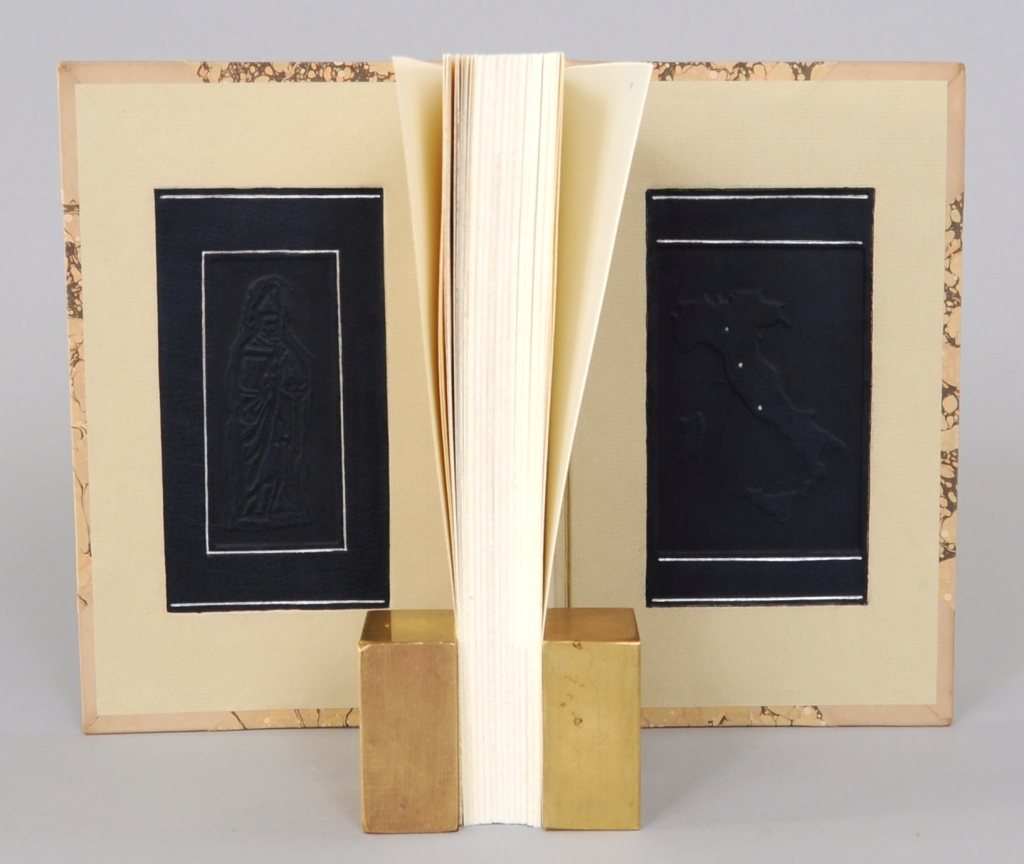
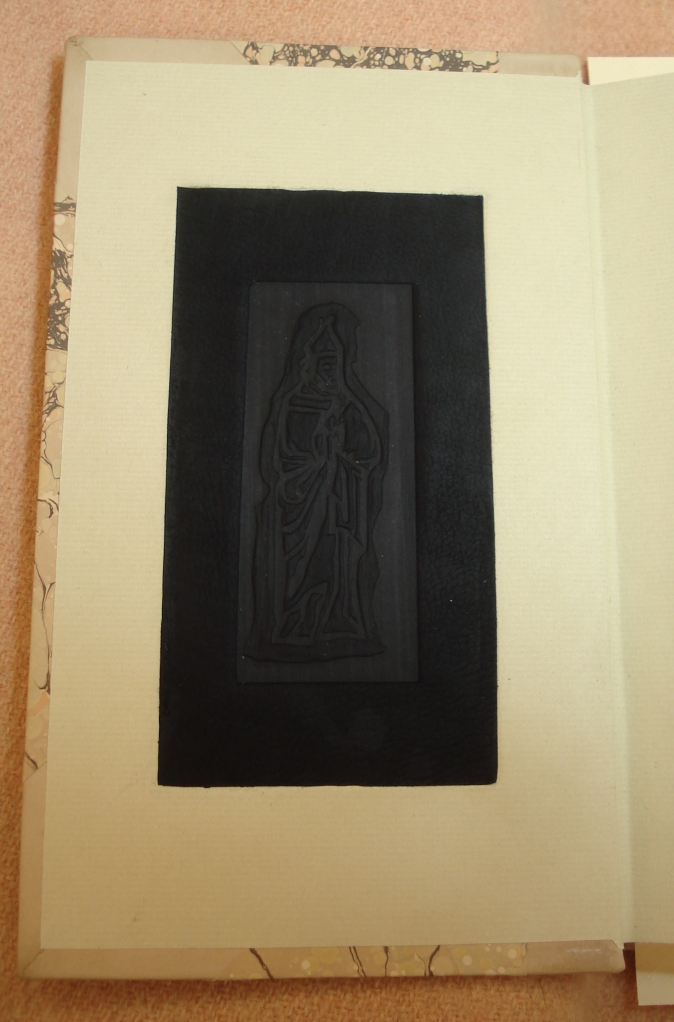
This binding was intended as a gift, to be given during a tour through Italy. Working collaboratively, we created a design that would make the book unique and document the trip. The insides of the boards feature blue calfskin panels, pressed with woodblocks and tooled with palladium. St. Augustine appears on the inside of the front board, while the back board shows a map of Italy with the location of each stop on the trip marked in silver dots. I’ll describe how the panels were made below. At the time, I did not know how to do doublures or leather hinges, so my method is probably a bit odd.
As I was making up the boards, I built a well into the inside of each.

After covering and trimming out, I adhered the pastedowns, carefully working the paper into sides of the well. In a tight-joint binding in which the pastedown and flyleaf are composed of paper with no additional leather hinge, the pastedown will come up short along the fore-edge. This gives an uneven appearance, since the visible turn-in (i.e. the square) on the fore-edge is much larger than those at head and tail. To compensate for this, I trimmed the head and tail of the pastedown so that the squares would match with the fore-edge. The cut goes to about a board thickness away from the joint and the transition is mitered at a 45 degree angle. This allows the full length of the endsheet to go over the joint, while leaving a neat transition. What I have described is most visible at the tail part of the joint in the above photo.
My friend is an accomplished woodworker, so he carved the woodblocks for the front and back board, drawing inspiration from depictions of St. Augustine.

St. Augustine by Piero della Francesca (1454), Museu Nacional de Arte Antiga, Lisbon
A basswood block, shorter and narrower than the wells, was cut in shallow relief. The blue calfskin was flat pared so that it was thinner than the depth of the well – I did not want it to sit proud of the board surface when done. It was then dampened, pasted up, and worked into the well. While the leather was wet, I simply aligned the woodblock and gently pressed it into the leather using a nipping press.
 I got the idea from Katherine Beaty’s presentation on Islamic bindings at last year’s GBW Standards meeting (see her handout here). I repeated the process for the map of Italy on the back board.
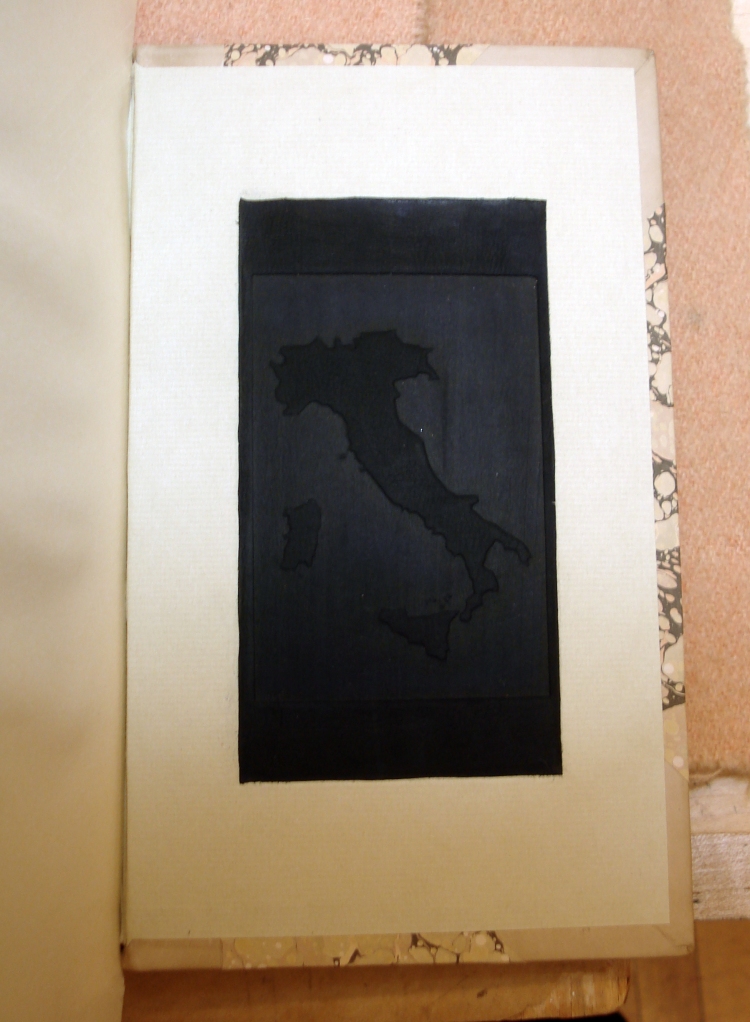
When dry, I added some tooled lines at the edges of the leather in palladium and also marked the stops on the trip with tooled dots. I was very pleased with the way the woodcuts came out on the leather. The calfskin takes the grain of the wood beautifully, and after polishing the surface a bit with a heated iron, these panels really look great. My only complaint in this binding is the edge between the paper pastedown and leather panel; I wished it could have been a bit cleaner. If I was going to do this again, I would forego the paper and do it as a sunken doublure. I did not know how to do doublures at the time, so it couldn’t really be helped. I will definitely be using woodblocks for future bindings, however.
It is time to wrap up and say goodbye to 2012. This has not been the easiest year for me personally, but I learned a great deal and got to work with some very talented folks. Quetzalcoatl didn’t rise up and destroy the world either, so I think overall we can judge it a successful year. In this moment, I’m feeling setup for a pretty great 2013 – in a couple weeks I will be moving to the Midwest and starting a new job. I am sure that I will have plenty of material from my upcoming adventures to share here .
Wishing you and yours a safe and pleasant New Year!
One of the first full leather bindings that I did at NBSS was a calfskin binding in the style of trade bindings popular in the 18th Century. The textblock is sewn on single raised cords that are laced into the boards. The leather is sprinkled and tooled in a style that is known as the “Cambridge Panel”.

I’m going to admit upfront that I don’t know all that much about the history of this style of binding. I know that they are common for the period, as they are quick to execute and, depending on the extent of decoration, were probably rather inexpensive for a full leather binding. I will venture to guess that a lot of the form in this structure evolved from demand for print and speed of production, availability of materials, and working conditions within the binding trade at the time. Since a great deal of information surrounding the book trade in England and France in the 18th century is still up for debate, and we are working with completely different materials today, this model is really a poor approximation/composite derived from examining secondary sources and historical examples. In the end, it probably looks and acts very differently from an authentic binding of the period.
A list of references will appear at the end of this post. If you wish to learn more about this style of binding, I encourage you to read some of those – or attend one of Jeff Peachey’s lectures or workshops on the subject. The NY Chapter of the GBW has a nice review of one of those workshops here.
With those caveats, onto the discussion of how I produced this model. I started by folding down sheets of Gutenberg laid paper to make sections. Rather than relying exclusively on pressing to condense the textblock, traditionally the sections are beaten with a large hammer on a marble slab. The beating compresses the paper and allows the sections to form into one another. After pressing, the kettle sewing stations are sawed in and the endsheets added before sewing onto single cords. For this model, I made endsheets composed of a single folio of marbled paper nestled inside a single folio of plain paper. The literature, however, describes a few variations for endsheet structures.

For larger books, there would be more sewing supports; however, this model is extremely small, so I stuck with five. This textblock was sewn without pre-punching the sections. The textblock was then rounded and backed.
Book board during this time period was very different from the manufactured board we typically use today. To give the book a more appropriate feel, pasteboards were made from cotton linters using Alan Puglia’s method (1996). Rather than making two separate boards the size of the book, I made a single large board and cut it in half, holding the knife at a 45 degree angle. This produced two boards, each with a bevel that would fit into the shoulder of the textblock. The picture below was taken before the final spine shaping, but illustrates the cut of the boards.

The ends of the sewing supports were frayed out, and twisted to points with a bit of paste and the boards are laced on. My model is done in more of a French style, so the lacing is done in a 3-hole pattern common to French bindings. English bindings from this period make use of a two-hole lacing pattern.
 With the French board lacing, the cord on the inside of the boards can be “cross-mounted”, so that the end threads back under itself and is essentially locked in place. The lacing is hammered on a hard, flat surface to close up the holes and flatten the boards.
 Bindings from this period exhibit a range of different spine linings: from no linings at all, linings at just the head and tail panels, to full parchment transverse spine linings. I went with the latter, but cutting the parchment into a comb shape that passes through the lacing, rather than fighting with individual patches (see above and below). According to some of the manuals, these parchment linings were put on before backing the book. That seems really difficult to me, so I ended up rounding and backing mine a bit before lining, then finishing the spine shaping off as I was adhering the parchment.
 When the spine is shaped and lined, the plain and marbled folios of the endsheets are made together with wheat starch paste and left to dry under weight. Now it’s time for trimming and edge decoration. The head and tail of the textblock are plowed in boards, shifting the boards down a board thickness each time to create a square. Next, the boards are pulled back and wooden trindles are pushed between the boards and spine to temporarily flatten the round out.
 The fore-edge is plowed and the trindles removed to reshape the spine. The fore-edges of the boards can then be trimmed to the appropriate length in the plow.
As for edge decoration, I know of four styles that were popular during this period and ranged in price: all edges red, sprinkled, marbled, or gilded. Vermilion was most likely the pigment used to create red edges – but since that substance is toxic, I decorated my edges with watercolor. After edge decoration, single core, two-color endbands are sewn on (pictured far below).

At this point, the textblock is ready and now the leather must be prepared. A piece of undyed calfskin is cut out, leaving about 1″ for the turn-ins, and is marked up for paring. After edge-paring with the knife, I created a long bevel out along the edges of the leather and thinned the spine area using a modified spokeshave. This is not an 18th c. tool, but it certainly makes life easier. After paring, the leather is dyed to an appropriate brown with analine or sellaset dye.
 The covering process is unremarkable, except for the corners. In a modern leather binding, careful attention is given to mitering the corners and doing the turn-ins so that where the leather meets at the corners does not show. For this model, the corners are just cut with scissors after the leather is turned in. Crude, but quick. After covering, the book is tied up for 10-15 minutes to make sure the leather is adhered around the raised bands.
 After drying overnight between felts, the book is opened and the joints are set.
A few of the bindings that I have seen from this period have either leather patches or are covered with two or more joined pieces of skin. I thought I would give the process a try with this model, so I selected a piece of calfskin for covering that had two sizable holes. After covering, I pared around the edges of those holes and inlayed more dyed calf. The result was not totally seamless, but is was more or less effective and ends up looking way better after decoration and polishing.

The Cambridge panel design for this binding is created through sprinkling the leather and then tooling it. As with the edge decoration, I have foregone the traditional chemicals for sprinkling in favor of black leather dye. The panel design is created through a series of templates that can be easily lifted away.

The boards are opened and the textblock is placed in a lying press. After masking off the area around the book…
 … the two center panels are placed on the boards. Not wanting to spray leather dye all over good weights, I taped some old piano tuning pins together to hold my panels down.

The leather is then lightly sprinkled evenly across the areas of board and spine that are exposed. Now the inner panel is removed and the outer-most panel is placed on. A little tent is also made to shield the spine. The inner-most panel is heavily sprinkled with dye.  The result looks like this:
 I got a little overzealous with the brush and ended up with a few large dots; ideally the sprinkling would be much finer.
The tooling pattern is fairly simple, but with a great deal of variation in historical examples. Using double or triple line fillet, pin-dot rolls, or other decorative rolls, the sprinkled panels are outlined. Fleurons typically appear at the corners of the outer panel. Here is a photo taken after the first set of lines.
 The edges of the boards are often tooled as well, either in blind or gilt. I used a decorative roll with a floral design that is wider than the board thickness.

I decorated the spine with double gilt lines on the sides of the bands and a red lettering piece.

Titling on 18th century books is done with handle letters rather than a type holder, so there is a bit of movement in the letters. It also appears that most finishers didn’t plan out their titling before starting, so their spacing and layout seems very odd to the modern reader. I copied the titling for my model from this first edition of Candide from 1759.

After the finishing, the pastedowns are adhered inside the boards. Since this is a tight joint binding, this structure of endsheet comes up short at the fore-edge, giving pretty uneven squares. The paper pictured below comes from The Marbler’s Apprentice. This is one of their older papers, so the pattern is a bit too large for the size of this book; however, I understand that they are now offering these same papers in smaller patterns as well.

I’m thankful that the long weekend has given me some time to put together a post for November. As always, I have a number of other topics in the works – stay tuned.
______________
Bennett, S. (2004). Trade bookbinding in the British Isles, 1660-1800 (1st ed.). New Castle, Del.: British Library.
Dudin, M. (1977). The art of the bookbinder and gilder. Leeds: The Elemente Press.
Gauffencourt, J. (1987). Traite de la relivre des livres: A bilinqual treatise on bookbinding. Austin: W. Thomas Taylor.
Hobson, A. (1954). The literature of bookbinding. Cambridge: University Press.
Pearson, D. (2005). English bookbinding styles 1450-1800 : a handbook. London: British Library ;
Pollard, G., & Potter, E. (1984). Bookbinding manuals: An annotated list of technical accounts of bookbinding to 1840. Oxford: Oxford Bibliographical Society.
Puglia, A. (1996). Pasteboards. The Book and Paper Group Annual, 15. Retrieved from http://cool.conservation-us.org/coolaic/sg/bpg/annual/v15/bp15-13.html
Despite how hectic things have been this summer, I’m committed to getting a post in for the month of August. It’s also my 50th post! This one is a brief “instructable” for making a fancy leather binding out of a not-so-fancy trade paperback. Unfortunately, I only took one in-process photo of the book, so much will be left to the imagination.
This past spring I was in a gift-making mood and had a devious idea for a good friend of mine, who is a bibliophile and connoisseur of the occult. I started with a common edition of The Book of Lies by Aleister Crowley. It is a perfect title for this structure…
") This book is what you would call “perfect” bound – single sheets attached with only adhesive and covers composed of a single piece of printed or laminated card adhered along the spine. Since the book is completely square, I could not simply stick a leather case binding on it. There is no round in the spine and, because of the lack of sewing, there is no swell. In order to put on boards of any thickness, a false shoulder had to be constructed on the book.
This book is what you would call “perfect” bound – single sheets attached with only adhesive and covers composed of a single piece of printed or laminated card adhered along the spine. Since the book is completely square, I could not simply stick a leather case binding on it. There is no round in the spine and, because of the lack of sewing, there is no swell. In order to put on boards of any thickness, a false shoulder had to be constructed on the book.
After tearing off the paper covers, I placed the textblock in the job backer and, using the hammer, rounded the spine a bit and formed a small shoulder. A piece of thin cord is then saturated with PVA and stuck to spine edge of the textblock at front and back to further build the shoulder. The spine and false shoulders are then lined with Japanese paper to consolidate and hide the cord. If the for-edge of the book remains flat after shaping, a round can be sanded into it with sandpaper and an appropriately sized piece of dowel.
The endsheets for this rebinding are composed of a plain paper folio, with a piece of thin leather or book cloth tipped to the outside of the fold. Decorative paper is then made to the outside of the folio, covering the edge of the bookcloth or leather, one board thickness away from the fold. This will be a tight-joint binding, with an island pastedown. We want the decorative paper on the fly-leaf to end at the seat of the shoulder and not ride up across the hinge. The finished endsheets are pictured below:

I used papyrus instead of decorative paper for this binding. The use of the material references the author’s experiences in Egypt, but also adds a nice textural feel to the endsheets. Unfortunately the pull of the papyrus overcomes the paper I used for the folio, so the flyleaves don’t lie flat. This isn’t a fine binding, however, so no need to despair! The endsheets are tipped to the textblock and worked with the bonefolder to finish creating an even, 90 degree shoulder to the thickness of the boards.
Philip Smith (1974) describes a sturdier method for creating a false shoulder in which the cord is wrapped in pasted-out leather and formed into a triangle as it is adhered to the bookblock (p. 85). The endsheets are then over-sewn through the false shoulder. If this was a larger book, I would probably have employed Smith’s method.
When the endsheets are on and the new shoulder is formed, the endbands are stuck on the spine. I made rolled leather endbands (to the height of the squares) for this binding in the same way that I did for the millimeter bindings. Once again, the picture below shows the final look. It’s black goat on black goat… so a bit tough to see.

After endbands, the rest of the spine is in-filled and sanded to make it flat and smooth. A 1-on-2-off hollow is then constructed on the book and trimmed down so that it doesn’t show over the endbands.
Next the false bands (or “sham-bands”) are constructed out of strips of parchment laminated to full-thickness leather. These will give the book the appearance of being sewn on raised supports, encouraging the causal reader to think that I have spent considerable time and effort creating this binding. But remember – it’s a book of lies! Regardless, this is a time honored tradition: bookbinders have been using false bands to fancy up their products while cutting production time since at least the mid-17th century (Pickwoad, 1994, p. 91).
 To give the bands a crisp 19th-century look, I attached them with the parchment side out. I placed them where sewing supports would be along the spine of the book, centering them toward the head. The bands are put down with PVA and trimmed off flush with the face of the board.
Now we are almost ready for covering. The boards are cut to size and back-cornered. The leather for the spine and corners is flat-pared to 0.7 mm and then pared German-style so that the turn-ins are the thickness of the in-fill material. At this point, the leather for the corners can be put on.
The covering process for this book is a bit odd, because the boards are not laced on. After placing the boards on the book (aligned and squared-up), the book is secured in the lying press. The spine leather is dampened and pasted out. The spine of the book is sized with paste and a little PVA is brushed onto the bands to make sure they stick. When ready, the leather is molded over the spine by hand. The bands are gently set with band nippers to mark their place.
Quickly, the book is removed from the press and the textblock pulled away from the boards. The spine turn-ins are done, leaving enough leather to form the headcaps. The head and tail of the textblock spine should be re-pasted at this point so that the turn-ins will adhere, and the boards are placed back on the textblock. The leather can be really worked down now, and the band nippers are used to set the bands. Headcaps are formed and the leather is worked into the back-corners of the boards. After going back across the bands with the nippers, the boards are set by opening them back and re-seating them in the joints. Everything is then double checked to make sure nothing has moved. After about 10 minutes of drying time between felts, the book is triple checked! The result is something like this:

The above image is after trimming the leather, in-filling with card and siding up with marbled paper. I made the paper with with Chena River Marblers in our Marbling Workshop.
Leather covering on a book is certainly fancy, but adding a bit of gilding will make it that much better.

The finishing on this structure is actually much lower risk than a typical binding with laced on boards. At this stage, the paste along the spine is the only thing attaching the leather case to the bookblock. If something goes terribly wrong with the tooling or titling, you can just pull the covers right off and re-make them. You will lose some leather and some boards, but that is a small price to pay!

When the tooling is finished, the leather or bookcloth hinges are adhered to the insides of the boards to completely attach the case. The turn-ins and hinges are trimmed out and the insides of the boards are filled with paper to level the surface. Finally, the paste-downs are adhered to the insides of the boards.

This structure is not particularly sturdy, nor does it open all that well. It does, however, look a great deal nicer than the original paper binding.
I promised that this blog would endure and it will – although my posting schedule will probably remain erratic. I can commit to churning out at least one thing a month, though. Stay tuned – exciting times ahead!
_______________
Pickwoad, N. (1994). Onward and downward: How binders coped with the printing press before 1800. In R. Myers and M. Harris (Eds.), A Millenium of the Book (61-106). Delaware: Oak Knoll Press.
Smith, P. (1974). New directions in bookbinding. Van Nostrand Reinhold.
Back in February, Peter Geraty came to NBSS to teach a two-day workshop with the second years on parchment over boards bindings. Parchment has a reputation for being somewhat unruly as a binding material, and the goal of Peter’s workshop was to provide us with a system by which we could more easily work with the material. In general, it was a fun couple of days and my confidence in using parchment on stiff board bindings has greatly increased.
These bindings are elegant and particularly satisfying binding to handle. The covers are cool to the touch and the visual texture of the skin is eye-catching. They are quite durable, chemically stable, and take gold tooling well. Parchment is hygroscopic, however, and dimensionally unstable (Wood, 1995). For this reason, covering stiff boards with parchment and keeping them flat can be quite challenging. It is much easier to use parchment in a limp, non adhesive structure (see my post on those here). When the book is finished, it must be stored at a stable temperature and relative humidity to keep the boards from warping.
Unfortunately, I was too busy trying to finish my model over those two days to take any photos during the binding process. Therefore, I will just share images of the finished binding and include a brief description of Geraty’s method of construction at the end. Peter Verheyen has written a well-illustrated procedure for parchment over boards (see link at bottom), but as a case structure, rather than with the lacing that I will describe.

Spine and fore-edge views.

A view of the open joint, showing the lacing of the sewing and endband supports.

A detail image of the sewn endband and headcap.

The endsheets.

Procedure:
In the first step, we chose parchment for our book and cut it to size, leaving ~2.5 cm for turn-ins. Like the limp bindings, the thickness of the skin should be based on the size of the book. The skin that we used was quite thin and flexible, however, the opening may end up stiffer than one would like for a book of this size. We lined the flesh side of the parchment with text weight paper, using high bloom gelatin as an adhesive (available from Kramer). The paper lining reduces the transparency of the parchment (which will keep the color of the boards from showing through after covering) and stabilizes the skin, making it easier to work with later. Animal-derived glues are recommended for this step, as they are most similar to the character of the parchment and keep the moisture (and distortion) to a minimum.The laminate is then placed between Hollytex or Reemay and blotters and left under weight to dry overnight.
As the parchment dried, we prepped the textblock and boards. The endsheets for this model are a single folio of Hahnemuhle Ingres, hooked over a single folio of text paper. We also tipped Japanese paper hinges to the inside spine edge of the first and last sections; some binders call these loose guards, but I’m sure there are other names for them. The sections are sewn on 4 narrow (2 mm) parchment slips. Historical examples of this style of binding that I have seen are often sewn on much wider parchment slips. The binder would often then split the support at the shoulder, so that only a narrow portion of the tape laces through the cover at the joint. For a model of such small dimensions, wider sewing supports were not warranted. After sewing, the free ends of the Japanese paper guards are adhered to endsheets.
The textblock is squared up, the spine is pasted up with wheat starch paste, and the fore-edge trimmed. The book is rounded and backed, creating a 45° shoulder, and the head and tail edges are trimmed. If the book was getting edge decoration, now would be the time to do it. Simple, 2-color silk endbands (with a bead on the front) were sewn on two layers of 2 mm parchment for cores. The inner layer of parchment is trimmed to the width of the endband, while the outer is left long and will lace through the cover with the sewing supports.
When the book is rounded and backed, boards of the appropriate thickness can be constructed to fit the textblock shoulder. Geraty and Verheyen recommend making a “floating” board to control the warp from the parchment. This board is composed of a thicker base board with a thin board tipped to the spine edge (See Verheyen p. 5 for diagram). We used millboard (from Conservation by Design Ltd.) as the base and 10 pt. Bristol board as the thin board. Each were lined on both sides with text-weight paper. The boards were nipped in the press and left to dry under weight. When ready, they are cut to the size of the book and the thin board is tipped to the thicker with PVA.
The spine of the textblock is patch-lined with muslin and a hollow tube of handmade paper is adhered over that. After trimming the hollow to height, it is slit down the shoulder about 2 cm at the head and tail to allow for the turn-ins. The boards are attached to the textblock by putting dots of PVA on the extended muslin lining and putting the boards in place (leaving an open joint). This weak attachment is only temporary, and serves to hold the boards in place during the covering process.
The parchment must be marked out and prepped a bit before covering. The spine width is measured and transferred onto the parchment. Lines are scored with the bone folder at the spine markings. A Dremel or Foredom Flex Shaft with a sanding drum attachment is used to thin the parchment at the endcap area. This is much easier than trying to pare it with a knife. The spine of the textblock and spine area of the parchment are then brushed out with PVA, and the textblock put into place. After working the parchment down a bit with a teflon folder, the book is placed between press boards made with small dowels that fit the joints. This applies tension to the parchment across the spine and holds the book in place so that it can be really rubbed down with the folder. Proper adhesion is key. The faces of the boards are then glued out with PVA and the parchment is worked into the joint and across the boards. After doing the head and tail turn-ins (and forming the endcaps), the fore-edge turn-ins are done.
The sewing supports and endband cores pass through the covering material at the point of the shoulder and back inside the covers at the edge of the boards. The ends of the parchment lacing are then glued down to the inside of the board. After trimming out the turn-ins, the glue spot attachment between boards and muslin is pulled off. The textile is fully glued out and put down on the inside of the boards. The tapes and muslin are trimmed back and, to finish, the pastedowns of the endsheets are glued out and stuck down.
I keep hinting at the long list of projects that I have yet to write about and post. Rest assured, I’m going to keep ’em coming. Your patience will be rewarded!
______________
Brockman, J. (1993). A Vellum Over Boards Binding. The New Bookbinder, 13, 43-53.
Verheyen, P. D. (2004). Vellum on Boards. Library Publications. Paper 16. (available for download here)
Wood, C. (1995). Conservation Treatments for Parchment Documents. Journal of the Society of Archivists, 16(2), 221-237.
Over the two-year program at NBSS, we make a lot of blank books as models that inform our understanding of the book as a moving system. They give us the opportunity to try out different materials and structures to see how they operate. Most of our models are the same size and use the same textblock paper (which is never true for printed books), and we often vary the sewing supports, thickness of thread, and spine linings for each style of binding. This makes it a bit difficult to make exact comparisons of how those variables affect the book action. One interesting (and quick) project that we did at the end of the first year was designed specifically to compare book action for different sewing structures.

This project is inspired by Tom Conroy’s article titled The Movement of the Book Spine (1987). [Disclaimer: Tom actually taught this as a workshop some years back – both here at the school and other places – so these are based on his design, but may not be exactly as he teaches it.] Conroy’s article attempts to isolate and discuss the variables that affect the action of a codex with a rounded spine, including the supports and sewing, height and shape of the round in the spine, and linings. The introduction suggests that one make a series of binding models “in which only one variable at a time is altered” in order to compare them. Obviously that would be a huge number of models, so our project attempted to do so for just the sewing structures.
Over the course of a class day, we made a series of extremely rough, tight-back leather bindings. Each binding was composed of the same number of sections, each with the same number of folios of Mohawk paper. The same thread and number of supports were also used for each, but the type of support and style of sewing were varied.

Two basic types of linen sewing supports were used: German tapes and 6-ply cord. One book block was sewn with 2-hole lap sewing over the tapes (above, top). The next was sewn with loops over single cords (below, top). A third was sewn with packed sewing over single cords (below, bottom). The fourth textblock was sewn with a herringbone linkstitch over double 6-ply cords (above, bottom).

Conroy (1987) notes that the tension of the supports will affect both the shape of the spine and the book action (p. 15). Too little tension will leave the book loose and somewhat spongy – causing the boards to skew. Too much tension will put the supports are constant strain when the book is rounded and backed. The effect is more pronounced for thongs (animal) than cords (vegetable), as the cord is less elastic (Conroy, p. 15). All sewing was done on a sewing frame in order to achieve proper tension on the supports. The books were also all sewn in one sitting, compressing each section with the bonefolder as we went, in order to be as consistent as possible.
The spines were all glued-up with hide glue and rounded and backed to get a 90 degree shoulder. Davey board was cut to the size of the textblock.
Conroy classifies the spine linings and covering material of the books as either “tension” or “compression” layers (p. 4). When the book is open, layers adhered directly to the spine will be put under tension, while those further out will be compressed (See Conroy’s paper for diagrams). We often line the spines of our books with layers of textile, paper, and/or leather to achieve the right opening for the size of the book and drape of the paper. Paper (in general) produces a much stiffer spine opening, while leather and cloth are more flexible. In order to simplify the spine lining variable, we finished these bindings as tight-backs with leather as the only spine lining.
Small squares of full-thickness leather were cut for each book, dampened, and pasted out with wheat starch paste. After letting the paste soak in for a couple of minutes, the paste was gently scraped off and a new coat applied. A square of leather was then applied to the head and tail of each book, so that it covered all but the center sewing support. The result is kind of like a cut-away model, allowing you to easily see the sewing structure of each book. Note that there are no headcaps; The leather is cut flush to the boards and textblock, and the boards are not back-cornered. Like I said, these are models are quick!

After the leather was applied, the books were tied up in the usual way. A long piece of cord is wrapped on either side of the bands immediately after covering to keep the leather from pulling away as it dried. For the book sewn on double cords, a third wrap was made across the center of each band (see above). We made some rudimentary tying up boards out of scraps of binders board in order to keep the cord from marking the leather that goes across the face of the board.
The books were allowed to dry and opened the following day. The pictures that follow attempt to show the different openings for each book. While the results are not so visually dramatic, variations in spine flexibility are easily felt through handling. Note the shape of the spine on each.
The spine of the book sewn on tapes throws up a great deal and opens in a “V” shape.

The book below is sewn on single raised cords (unpacked sewing). It’s spine has more of a “U” shape from the stiffer support, but still exhibits high throw-up.

The book sewn on single packed cords, however, has a very different shape from the one above. The packing of the sewing essentially creates a thicker, stiffer support, reducing the throw-up of the textblock.

Finally, the book sewn on double cords has the least amount of throw-up.

These pictures also illustrate how the movement of the spine affects the leaves. As Mohawk is a pretty stiff paper, less throw up from the spine keeps the pages from lying flat.
Essentially, these bindings show that increasing the diameter (profile) of the sewing support will make it stiffer and reduce the throw-up of the textblock (compare tapes to single raised cord sewing). Also, packing the sewing creates a thicker and stiffer support (compare single cords to single packed cords). Increasing the number of sewing supports makes the opening stiffer as well (compare single to double raised cords). I really enjoyed Conroy’s discussion and many diagrams that illustrate these concepts (p. 10).
But why, you may ask, do we spend all this time thinking about the subtle interactions of the materials that comprise a book spine? A book must function in order to be a book. If it doesn’t open, it is essentially a block of paper; if the sewing and adhesive fail, then it is basically a pile of loose sheets. Books that open well, without creating undue strain on the text or covering materials, are more enjoyable to use and will last longer. Whether creating a new binding or repairing a damaged one, by manipulating the sewing, supports, or linings, one can create a customized book action that is sympathetic to the materials. That is just one of the beauties of a handmade book.
I’ve just shown you some of the roughest looking leather bindings you can make, so next in my next post I’ll go in the complete opposite direction with some pictures of my first French-style fine binding.
____________
Conroy, Tom. (1987). “The Movement of the Book Spine”. AIC Book and Paper Group Annual, 6, 1-30.
In this post I’m going to discuss limp leather case bindings. This style is perfect for rebinding books of a specific dimension – mainly flexible, pocket-sized volumes (with no shoulder) like language dictionaries and some versions of the New Testament. These case bindings fall at the end of the first year in the NBSS curriculum, since they require a great deal precise leather paring, but no hot tooling.
For my first, I started out with a damaged copy of Kipling’s Kim that I found at the Brattle Book Shop. The front board was missing entirely and the red leather was extensively red rotted.

Very little of the gold decoration on the spine remained. The back board was also completely detached.

This volume came from a set, published by MacMillan and Co. in the early 20th century and probably originally looked like this one:

My time-ravaged copy included a rather interesting addition, however. Tucked inside the pages, I found this very brittle envelope.

The envelope contained a small silver gelatin print of Zamzama (also known as Kim’s Gun).

This edition is not difficult to find or very valuable, so I had no qualms with rebinding it. I discarded the remaining board and mechanically removed the leather from the spine after softening the adhesive with a methyl cellulose poultice. The blank flyleaves from the old endpapers were skinned off and also discarded. The original sewing was still in good shape, so I left it intact. New single-folio endsheets of Hahnemuhle Gutenberg were tipped on at the front and back. The spine was then re-lined with an aero cotton extended lining.

These are case bindings, so the cover is made off the book. The boards are simply 20pt Bristol board, with the hard edges and corners taken down using sandpaper. There are no endbands and the squares are very small. You can basically cut the boards to the width of the textblock – so that when they are pushed out slightly from the shoulder of the textblock to make a joint space, a small square is created. With the boards in place on the book, a scrap of paper is used to measure the spine and joint width. That measurement and the placement of the boards is transferred to the flesh side of the leather with a grease pencil or china marker. I also cut a spine piece out of thicker paper (like Dove Gray) that is the width of the textblock spine and the height of the boards.
We used goat skin to cover these volumes. The majority of the paring was first done in the Scharf-fix, flat paring the skin down to about 0.5 mm. The remainder of the paring was done by hand.
The paring for a limp leather bindings is quite a challenge; any irregularities in the paring can be seen and felt through the thin boards and across the turn-in areas of the spine. With the paring knife, all four sides of the leather are pared so that the turn-ins are a long bevel that goes down to absolutely nothing. The length and angle of the bevel should be gradual enough that a change in thickness is imperceptible when running your fingers across the leather. The headcap areas are cut at a gentle crescent, but also have a smooth bevel that goes down to nothing. While paring, I constantly check the consistency of the paring by laying the leather (grain-side up) on the litho stone and running my fingers across it. If any bumps or ridges are detected, I go back and smooth them out with the knife. Similarly, I will sometimes fold the pared area in half and run it between my thumb and index finger to feel for irregularities. This process can take a long time to get right the first couple of times.
When the leather finally feels right, it is dampened from the grain side, flipped over, and pasted out. While the paste is soaking in, the textblock is wrapped in plastic wrap (“cling film” for anyone in the UK). The first layer of paste is scraped off the leather with scrap board and a new, thin coat of paste applied. The spine piece and boards are then placed onto the leather according to the marks. At this point I’ll put it on the book and check to make sure everything looks right. Adjustments can be easily made at this point.
The next step is to do the corners – which we did in the English style. The leather is mitered at a 45 degree angle, cutting down at about 30 degrees, and about a board thickness and a half away from the board corner. The leather is then scooped out a bit right at the corner to make it thin enough to pleat. Now the head and tail turn-ins are done. The very tips of the corners are pleated down, and the fore-edge turn-ins are done – being careful to match up the miters of the corner so that they make a smooth surface on the inside of the boards. The finished cover is then wrapped around the textblock to dry.

The plastic wrap keeps the moisture from the leather from penetrating the textblock and warping the paper. The damp leather is extremely easy to mark up at this stage, so the whole package is then wrapped in felt and placed under a light weight to dry.

I left mine to sit overnight – but, depending on the environmental conditions, the cover will probably be dry in a couple of hours. When it’s ready, it can be decorated. I did not know how to do any tooling at this point, so I titled it in the Kwik Print.

This “terracotta” goatskin from Harmatan colors very nicely, so I did the stamping in blind rather than with foil. I built a little jig out of binders board to hold the cover in place on the platen of the Kwik print. I then dampened the leather a bit and with the temperature pretty low on the hot stamp, I would make a quick impression and see how much color came out. I would then dampen a bit more and repeat, being careful not to burn or blacken the leather, until an even impression was achieved.
These bindings also typically have a little blind rule that goes around the head, tail and fore-edge of the boards.

These lines were actually done with a bone folder. After gently marking out the lines with dividers and the bone folder on dry leather, the leather is evenly dampened with a cotton ball. The line is then marked again with the tip of the folder. The moisture and pressure are enough to make a permanent, dark line in the skin. This is the result.

The minimal spine lining gives the book a very flexible opening.

I also used this structure to rebind a small, well-used New Testament, that I believe was a gift as part of the client’s confirmation.

The original imitation leather cover and endsheets had become quite stiff and had cracked in several places. Once again, the sewing was intact and only minor page repairs were required.
The greatest thing about this being a case binding, is the ease with which one can title or decorate the new covers. Here I was able to reproduce the titling and name stamping in gold foil, once again, using with the Kwik Print.

This is a project that Jeff just demonstrated one afternoon, and I’m not sure if it can be attributed to anyone in particular. I have not seen any articles or handouts on this particular structure, so I have no other resources to point to for further reading. If you have encountered other instructions on making this structure, please leave a comment.
I’m working through these as quickly as I can. Basically I have loads of pictures of different finished projects – I just have to find the time to sit down and write about them. Thank you for being patient. Upcoming posts: Sewing models, atlas and album structures, springback account books, parchment over boards, 18th century trade binding, rounded spine leather box, and flag books!
Today I’m going to share a beastly, strange, Frankenstein of a book that I did for the “Time Travelers” show at the Asheville Bookworks. You can see an online gallery of the books in that exhibit here.
The time traveling theme was meant to give artists the opportunity to illustrate and respond to the various ways that book structures and materials have changed over time and across geographic regions. I decided to take the prompt a little more literately and ask what would happen to the book itself if it traveled back in time.
There is a lot of great literature out there about time travel; The Time Machine by H. G. Wells or A Connecticut Yankee in King Arthur’s Court by Mark Twain immediately spring to mind when I think of stories that follow this theme. I decided, however, that the high points of the genre have probably received too much attention already and that it would be a lot more fun to focus on one of the not-so-great stories. You know – one that nobody would spend time or materials rebinding. Maybe one of those titles that you often find in library book sales or your local thrift shop. Maybe even one that was adapted into video game and a feature film starring Paul Walker and Gerard Butler.
That’s right – I’m talking about Micheal Crichton’s 1999 book Timeline.

My submission to the show is rebound in the Carolingian style, fully covered in deer skin with a brass fastener (made by Kait Kennedy, a jewelry maker here at NBSS).

In the story, a group of history students travel back to medieval France to rescue their professor, Dr. Edward Johnston. After the their teacher disappears, the students find a 600 year old note from Johnston buried in the ruins of a castle and hijinks ensue. I thought it would be fun to make the book look like it had traveled back in time with the characters, but never made the return trip. I also like the juxtaposition of a machine-made, mass-produced piece of popular fiction in a binding from a time in which books were handmade, incredibly expensive, and unique. Technically, the story takes place in the 14th century, and Carolingian bindings are produced from the late eighth to the end of the twelfth centuries (Szirmai, 2000, p. 100) – but I’ve wanted to try one of these bindings for a while, so let’s just ignore the fact that this should be more of a Romanesque binding.
So a bit about the structure of Carolingian bindings, with the caveat that I have absolutely no experience with historical examples. While I’ve examined a hand-full of manuscripts from this period, none were in their original bindings. All my information comes from Szirmai’s chapter. These bindings are a kind of structural transition between the squared-up, leather-covered Ethiopian structures (unsupported chain sewing that also functions as the primary board attachment) and the rounded spine Romanesque and Gothic bindings (sewing on supports that are laced into heavy wooden boards).
As I said before, this is a Frankenstein of a book – not only content-wise, but because of the way I had to put it together. As many bookbinders know, it can be difficult to find a printing of contemporary literature that is actually sewn folios. Most are either single, adhesive bound sheets, or were folded sections that have been sawed open at the spine for better adhesive penetration. My copy was glued single sheets, so I had to reform the text into sections. Sections can be made by guarding the leaves together with Japanese tissue, but this method often creates a significant amount of swell at the spine of the book. Swell is good if the book is going to be rounded and backed, but because Carolingian bindings have flat spines, I needed absolutely minimal swell. I decided to use a sewing machine to assemble sections.

This method is a little bit crazy and I wouldn’t recommend it for a book that is meant to last – but it is quick and gets the job done. It might depend upon the model of sewing machine that you use, but the one that I used pierced the sewing holes very close together at the widest setting. Doing so effectively perforates the sheet, and since the adhesive probably isn’t going to be penetrating that far, you are creating a good opportunity for mechanical detachment of single leaves later on. Whip-stitching by hand, a common technique used in atlas bindings, would probably be stronger. But this book is for show, not to be read!
Traditionally a binder would probably prepare the boards as their first step (Szirmai, p. 103), then, after sewing, trim the textblock to the size of the boards with a drawknife (p. 119). I trimmed all the sections down in the board sheer to give a kind of rough-cut edge and then prepared the boards. Szirmai reports that a range of wood is used for the boards of extant Carolingian bindings; most are oak, but beech, fruit tree, and poplar are also found (p. 103). Unfortunately, I couldn’t get quarter-sawn oak boards that were large enough in time for the exhibit deadlines, so I had to fake some up by laminating layers of 1/4″ plywood and millboard.
 The result was a super-thick board (around 1/2″) that was heavy and hard like wood, but was extremely easy to drill and shape. Szirmai states that the thichness of Carolingian boards (with leather covering) ranges from 7 to 17mm (p. 103). After marking up the board and drilling angled holes for the lacing, channels are cut between the holes so that the laced cord doesn’t sit proud of the board surface. Szirmai provides a range of diagrams on the variations of lacing patterns through the board (p. 107).
 Szirmai (2000) states that cord was used primarily as sewing supports in the Carolingian bindings surveyed, but that white leather thongs are also found in books from France and Italy (p. 112). An extra long length of cord is laced through the front board, then tied up onto the the sewing frame. The sections are then sewn through the “center” around the double supports in a ‘herringbone’ pattern (Szirmai, p. 101).
After sewing, the second board is laced on. Traditionally, the free end of the cord is secured into the lower board with wooden wedges or dowels (Szirmai, p. 103). I didn’t have much faith in the strength of my boards, so I just frayed out the cord ends, fanned them out with adhesive, and hammered them into the interior surface of the board. The pastedowns are typically put down onto the boards before covering (Szirmai, p. 117).

Headbands are sewn either in the coptic style or around double cords that are laced into the boards (Szirmai, p. 121). A distinguishing feature of these bindings is the leather tabs that extend over the head and tail of the book. Shelving books upright was not a common practice during this time, and books were often stored in chests. The tabs facilitate lifting the volume up and out of it’s enclosure.
When the endband thread is anchored into the secitons, it passes through one layer of the leather tab. I used the same deer skin for the tab that would be used for the covering… this skin was odd to work with, but more on that later. Here is the endband from the back, showing the anchoring. .

It looks very rough, but after covering and doing the parimeter sewing to keep the parts of the tab together, the result is quite nice and super strong. Szirmai has excellent diagrams of several variations of tab construction (p. 125).

After cutting a small channel in the upper board for my fastener, the book was covered. Szirmai states that the majority of extant Carolingian bindings were covered in thick (2mm) ‘chamois’ or buckskin (species of origin unknown, p. 127). The skins of local wild animals were used, as Charlemagne’s edict of AD 774 gave the Abby of St. Denis permission to use deer skin their forest for bindings (Szirmai, p. 127). The deer skin that I used was actually donated to the school (along with a variety of odds and ends) some months ago, so I do not know from whence it came or how it was tanned. It was quite scarred, stained, and difficult to pare, however. Perfect for making a medieval book!

The covering leather is adhered directly to the spine, which actually produces a nice opening for the book.
The thickness of the boards meant that the turn-ins have to be left extra long and made doing the corners a bit of a challenge. Ordinarily, a leather corner can be pared quite thin and pleated along the inside of the board to fully cover the corner and deal with excess material. The toughness of the deerskin made this difficult, so I cut the leather as one would do a cloth corner. On the inside of the boards, I mitered the leather and stitched it – as diagrammed in Szirmai, Fig. 7.29 (p. 129).

Szirmai reports that the majority of surveyed bindings from this period are left untrimmed at the turn-ins (p. 129).
As for fasteners, Szirmai says that they were a regular feature on carolingian bindings, but that few of them have survived; all that remain are stubs of leather straps and holes from pins (p. 131). The author includes drawings of a few examples from the Abby of St. Gall with extant rings and pins that I modeled mine after.

The pin is just hammered directly into the lower board. The ring is attached by a looped piece of calfskin (stitched with a strip of parchment) and secured to the upper board with brass escutcheon pins.
As I said before, these books were not stored in the way that we are accustomed to shelving books, so I inked the title onto the fore-edge. I have not read all that much on the titling of books, so I do not know how titling or distinctive markings were made during this period. If you have suggestions for reading on the topic, please post them in the comments.
I think I’m going to try to put up a post on sewing models next. Look for it soon!
___________
Szirmai, J. A. (2000). The archaeology of medieval bookbinding. Aldershot : Ashgate.
